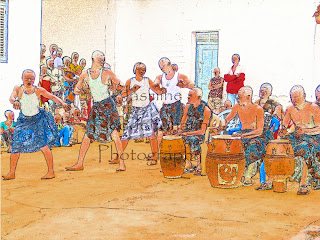
As you probably already know if you've been following my blog, I've been invited to contribute a photo collage to a calendar for charity (if you have no idea what I'm talking about, check out my previous post). The theme of the calendar is what peace means to each artist, and everyone else is contributing either a painting or a drawing. In order to make my collage fit with the rest of the calendar stylistically, I decided to teach myself all about filters for this project. For those who are reading my blog to pick up a few tips, you may find the next few paragraphs to be handy. For those who just want to see some pictures, this entry is particularly full of them! Below, I've posted the original photo (some with tweaks such as slight overexposure to make to make the filters work better), followed by the version I edited using filters. I've also posted two versions of the collage--same photos, arranged in different ways. I would really love some feedback if you have a strong initial reaction in favor of one versus the other. Finally, there are a few photos that aren't related to the collage--I just edited them for fun!
So, now to the technical tips. GIMP didn't come with some of the filters I was interested in applying, so I had to search around on the GIMP registry for a bit before I found the scripts I was looking for. I found these to be particularly useful. You'll need to have Python properly installed for these extra scripts to work, though (if you're confused by that statement, check out this entry). Download the second file (_246c.zip) and follow the instructions in the enclosed read me file. I will say, the scripts folder was not exactly where he said it would be, so I had to dig around a bit. I promise, though, it's there! Just snoop around in the GIMP files until you find it. If you're already running GIMP, you'll need to restart it before the scripts show up.
Ok, so you have your script installed. Now what? If you have a photo you're interested in editing open, take a look in the Script-fu menu option--you should see a bunch of new options under Photo Effects. There are also a few hidden in the regular filters menu for some reason--for example, the Stamp option, which gives you the ability to make a photo in the style of the iconic Che Guevara image, is hidden in Filters-->Decor-->Photo Effects-->Artist. No idea why. At any rate, just start playing around with all of these filters--me describing them in painful detail will never be as good as you fiddling around until you figure out what each little slider button on each filter does. A few pointers before you begin, though:
1. Don't save over your original! Give your experiment a new file name. Hopefully this is an obvious tip, but it's worth repeating...
2. One filter is probably not enough. On some of the photos below, I applied 10+ filters before I arrived at a photo I was happy with. For example, pastel, unsharp mask, oil painting, unsharp mask.
3. Don't be afraid to fiddle with the colors and really crank up the saturation--obviously it depends on the look you are going for, but I found that some of the images still looked way too much like photos until I started applying more vibrant colors. I actually did some color adjustments in Lightroom and then moved back to GIMP between filters for a few of the photos. The photo of the street below is a good example of this.
4. As you may have guessed from tip #2, I like to apply unsharp mask a lot. Turn the threshold down and the radius up quite a bit and it can really help to define the subject of the photo if applying an artistic filter made it look like a big ugly blob. Doesn't always work, but give it a shot.
5. I occasionally needed to edit a photo for color/contrast/exposure before editing to get the effect to work in the desired manner. The filters will be particularly uninspiring on low contrast or dark images. Don't be afraid to slightly overexpose or underexpose an image so that it will pop when you apply a filter.
6. I often use the smudge tool to remove some detail. Likewise, you may want to clone out some of the details. The photo of the children on the grey background and the buildings on the pastel street below are two good examples of this. Sometimes too much detail gives it away as a photo--try ditching some detail.
Alright, enough talk! Time for some photos.
Before:
After:
Before:
After:
Before:
After:
Before:
After:
Before:
After:
Before:
After:
Before:
After:
Before:
After:
Before:
After:
Collage version 1:
Collage version 2:
And some extras, just for fun!


No comments:
Post a Comment