Buy my art at ImageKind.com.
Showing posts with label West Africa. Show all posts

Wednesday, July 17, 2013

Tree-Hugging

I've been enjoying some beautiful evening walks in the sunshine recently, listening to the rustling of the leaves in the trees in the cool summer breeze, and I've had ample opportunity to appreciate the lush greenery. I love the way the trees change with the seasons, and they completely shape the mood of my walks.


Warsaw, Poland


Cambridge, England


Cambridge, England


Cambridge, England


Cambridge, England

This one looked to me like some kind of strange serpentine creature


Silver Falls, Oregon, US


Thunderbird Falls, AK, US


Malham, England


Volta Region, Ghana

This is the view from inside a tree--this kind of tree surrounds and draws nutrients from another tree, eventually killing the tree and resulting in this hollowed-out interior.


Cambridge, England


Cambridge, England


Utrecht, Netherlands


McHugh Creek Overlooking the Inlet, AK, US


So, what do you think? In the mood to go out and hug a tree yet?

Wednesday, June 20, 2012

It's That Time Again...

Once again, I'll be entering the Guardian's monthly travel photo competition and, once again, I'm having a hard time deciding which photo to enter. The theme this month is "Journey", and I have several travel photos that I think might fit the bill (below), but I can't decide which is most appropriate. As always, any thoughts/feedback are greatly appreciated!

Option 1: An old helicopter in the botanical gardens in Volta, Ghana.


Option 2: An airplane at the edge of the lake in Alaska.


Option 3: City directions from the Belfort in Bruges.


Option 4: On the boat ride to Ganvie stilt village in Benin.


Option 5: From the bus on a road through the Volta region in Ghana.

Saturday, March 10, 2012

Fun with Filters

As you probably already know if you've been following my blog, I've been invited to contribute a photo collage to a calendar for charity (if you have no idea what I'm talking about, check out my previous post). The theme of the calendar is what peace means to each artist, and everyone else is contributing either a painting or a drawing. In order to make my collage fit with the rest of the calendar stylistically, I decided to teach myself all about filters for this project. For those who are reading my blog to pick up a few tips, you may find the next few paragraphs to be handy. For those who just want to see some pictures, this entry is particularly full of them! Below, I've posted the original photo (some with tweaks such as slight overexposure to make to make the filters work better), followed by the version I edited using filters. I've also posted two versions of the collage--same photos, arranged in different ways. I would really love some feedback if you have a strong initial reaction in favor of one versus the other. Finally, there are a few photos that aren't related to the collage--I just edited them for fun!

So, now to the technical tips. GIMP didn't come with some of the filters I was interested in applying, so I had to search around on the GIMP registry for a bit before I found the scripts I was looking for. I found these to be particularly useful. You'll need to have Python properly installed for these extra scripts to work, though (if you're confused by that statement, check out this entry). Download the second file (_246c.zip) and follow the instructions in the enclosed read me file. I will say, the scripts folder was not exactly where he said it would be, so I had to dig around a bit. I promise, though, it's there! Just snoop around in the GIMP files until you find it. If you're already running GIMP, you'll need to restart it before the scripts show up.

Ok, so you have your script installed. Now what? If you have a photo you're interested in editing open, take a look in the Script-fu menu option--you should see a bunch of new options under Photo Effects. There are also a few hidden in the regular filters menu for some reason--for example, the Stamp option, which gives you the ability to make a photo in the style of the iconic Che Guevara image, is hidden in Filters-->Decor-->Photo Effects-->Artist. No idea why. At any rate, just start playing around with all of these filters--me describing them in painful detail will never be as good as you fiddling around until you figure out what each little slider button on each filter does. A few pointers before you begin, though:

1. Don't save over your original! Give your experiment a new file name. Hopefully this is an obvious tip, but it's worth repeating...

2. One filter is probably not enough. On some of the photos below, I applied 10+ filters before I arrived at a photo I was happy with. For example, pastel, unsharp mask, oil painting, unsharp mask.

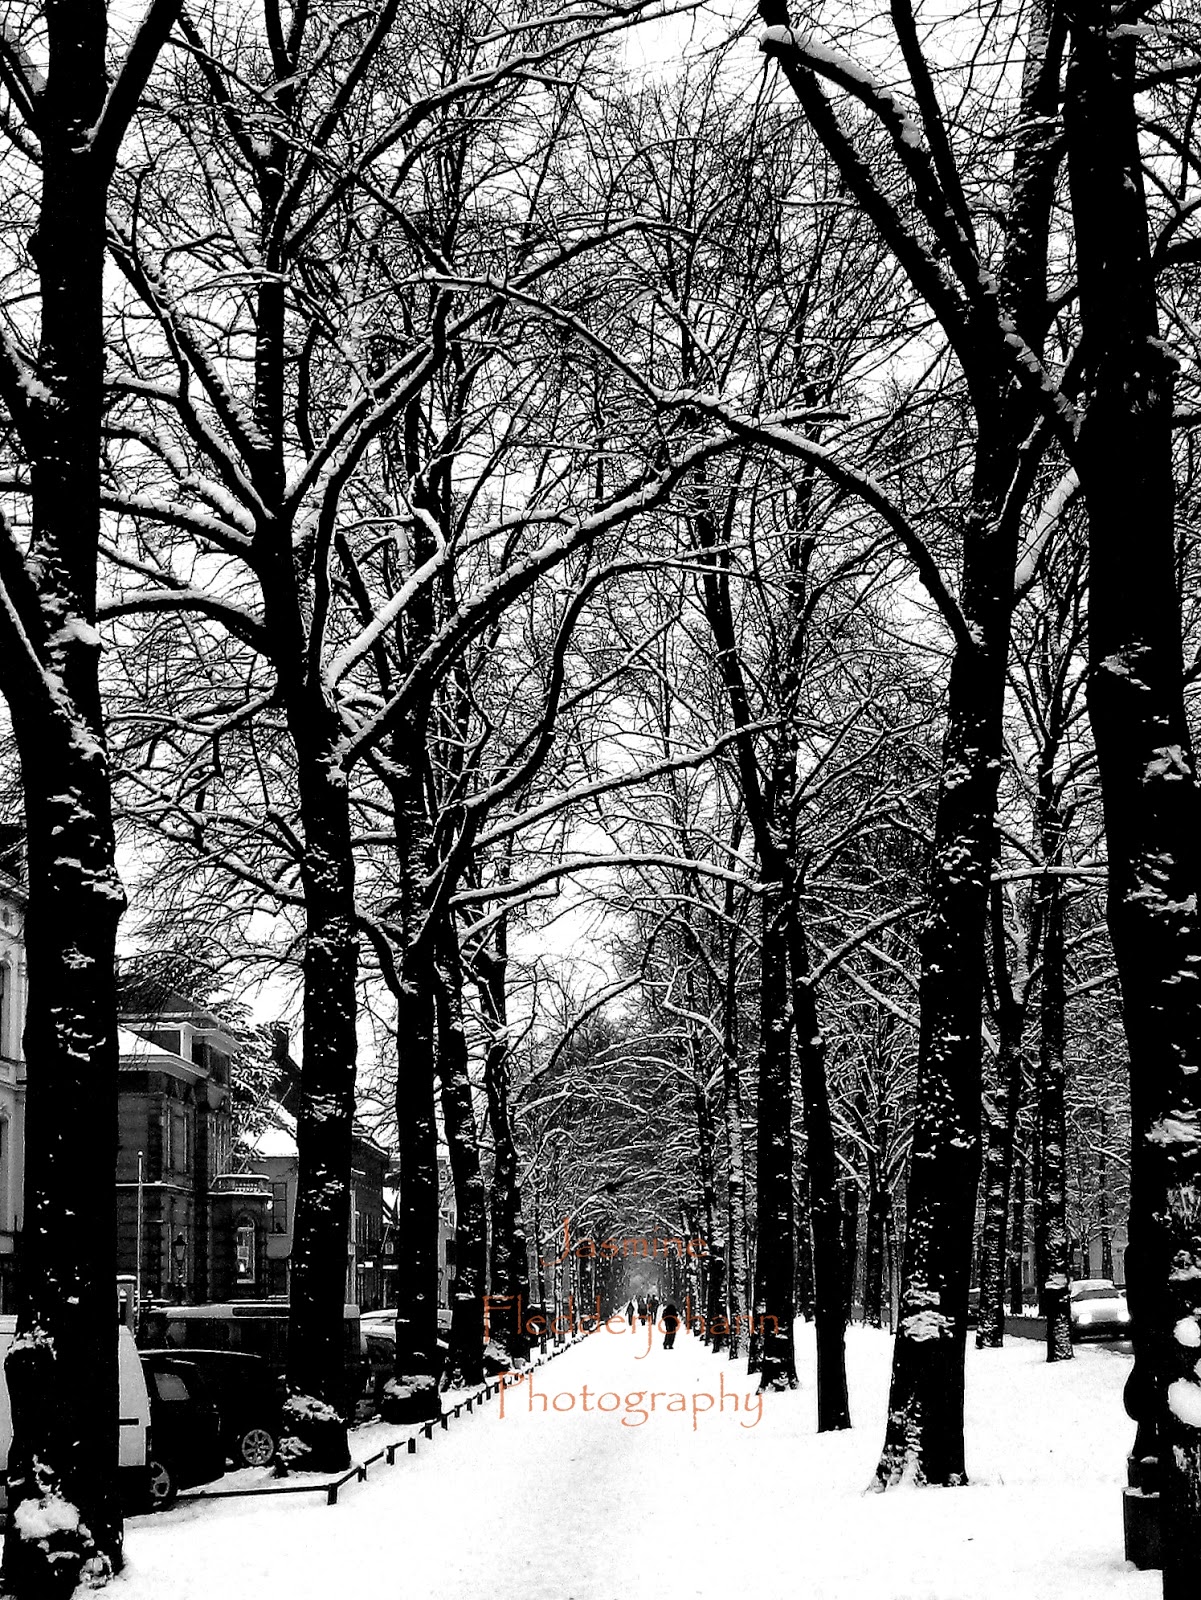
3. Don't be afraid to fiddle with the colors and really crank up the saturation--obviously it depends on the look you are going for, but I found that some of the images still looked way too much like photos until I started applying more vibrant colors. I actually did some color adjustments in Lightroom and then moved back to GIMP between filters for a few of the photos. The photo of the street below is a good example of this.

4. As you may have guessed from tip #2, I like to apply unsharp mask a lot. Turn the threshold down and the radius up quite a bit and it can really help to define the subject of the photo if applying an artistic filter made it look like a big ugly blob. Doesn't always work, but give it a shot.

5. I occasionally needed to edit a photo for color/contrast/exposure before editing to get the effect to work in the desired manner. The filters will be particularly uninspiring on low contrast or dark images. Don't be afraid to slightly overexpose or underexpose an image so that it will pop when you apply a filter.

6. I often use the smudge tool to remove some detail. Likewise, you may want to clone out some of the details. The photo of the children on the grey background and the buildings on the pastel street below are two good examples of this. Sometimes too much detail gives it away as a photo--try ditching some detail.

Alright, enough talk! Time for some photos.
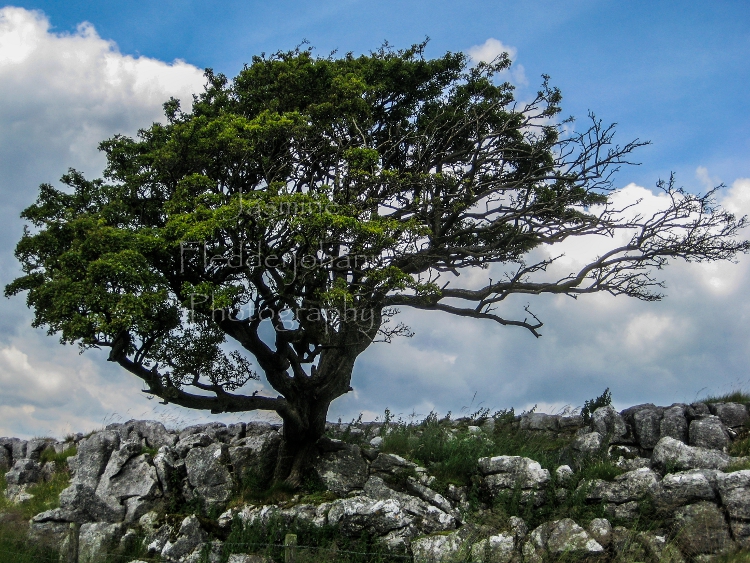
Before:


After:


Before:


After:


Before:


After:


Before:


After:


Before:


After:


Before:


After:


Before:


After:


Before:


After:


Before:


After:


Collage version 1:


Collage version 2:


And some extras, just for fun!


Friday, March 2, 2012

Creating a Collage

As you know if you read my previous post, I've been invited to contribute a photo collage to a 2013 calendar focused on the subject of peace. Obviously this will be occupying most of my creative time for the next few weeks, especially since I've never used GIMP to create a photo collage. So, if you're wondering how it's done, here goes:

1. In GIMP, select File-->New to create a new file

2. Select Image-->Scale Image and set the dimensions for your collage. You can set the dimensions in pixels, inches, etc in the first drop down menu on the right (next to the boxes where you can enter the width/height. Note: the aspect ratio is locked by default. To change this so that it doesn't automatically adjust the width when you set the height (or vice versa), click on the box that looks like chain next to the boxes for entering the value for width and height. Click the "scale" button at the bottom when you are satisfied with the dimensions.

3. You're ready to add photos now! I'd recommend using photos that have already been adjusted for contrast, tone, etc as a starting point. So, how do you add photos? Well, you'll need to select File-->Open As Layers for each image you want to add.

4. If your photo isn't the size you want it to be (and most likely it's not), you'll need to adjust the size of the layer (NOT scale image, but scale layer). How? In the layers dockable dialog box. This is a little moveable toolbox that says "layers" at the top, and it should have one entry for each pictures you import, plus an entry for your background. The layers dialog box should open as a default in GIMP, but if it doesn't you can go to Windows-->Dockable Dialogs-->Layers.

5. In the layers dialog box, right click on the image you want to resize. From the menu that appears, select "scale layer". Now you can resize the image just as you normally would. You will need to do this for each photo that is not the right size.

6. Lastly, move everything around and fiddle with the background colors until you are happy with the appearance. That's it!


My photo collage is very much still a work in progress, but I figured I'd go ahead and share what I have so far. I'm still working on shooting/editing photos to add, and obviously I still have some work to do arranging the photos. I am the only photographer in the calendar, and since everyone else is painting or drawing, I've been using artistic filters to edit my photos to fit with the stylistic theme. I'd love some feedback if you have any initial reactions/suggestions :)


Tuesday, January 10, 2012

Some Healthy Competition

I recently posted about the importance of self-promotion for getting a little recognition for your work.  I then whined a bit about the advice to sell stock photography, which I have been following (albeit somewhat grudgingly).  One form of self-promotion I think gets less attention, however, is photography contests.  Now, I suspect that there are plenty of shady contests out there that are just fishing for information or photos.  However, there are plenty of reputable photography contests as well.  Of course, there's no guarantee that you'll win, or even get any recognition.  But, so long as I steer away from those which charge an entry fee and watermark my images, what's the harm, right?  And who knows?  Maybe I'll have a bit of luck and someone will really like my photos.  Plus, finding an image which epitomizes the sentiment of the contest or category forces you to think about your photos in a different way, and to get cracking on editing.  With that in mind, I've decided to enter an online contest.  There are a few categories I'm having trouble picking an image for, though.  I've shown the photos below, and I'd be very grateful for some feedback. I've listed the category name along with the photographs I'm considering below.  I can only enter one photograph into each category with the exception of the portfolio category, for which I get to pick three photographs.  Obviously I'm planning to do some watermark work before I submit.  Also, if you see anything in my gallery that I haven't considered but you think I should, please let me know.  Likewise, some of these images might fit into more than one category, so if you think an image would be for another category, I would appreciate the insight. 


The Wild World (nature)


On Location (urban, city, using surroundings to enhance image)


Still Life


Breaking the Mould (anything weird or wacky)


Portfolio (3 images)